This blog was originally conceived as a personal reference. Later I added notes and my publications
Wednesday, October 6, 2021
Examples of poncho shelters
Hasty shelter-canopy fashion
A hasty shelter is made by suspending the poncho from low underbrush. Due to its simplicity, it can be easily erected at night, especially if heavy strings have already been tied to the corners of the poncho.
Hasty shelter-canopy fashion
This is another hasty shelter pitched canору fashion.
Poncho and spreader bars
This is a hasty shelter using a poncho and two branches for spreader bars.
Low silhouette shelter
This low silhouette shelter can be used while improving fighting positions. It can be lowered by removing the front upright supports.
Poncho shelter
Two ponchos fastened together will shelter four soldiers from the rain. Extra ponchos can be used as ground sheets.
Sleeping-platform and footrest
The following type of shelter may be used for a longer stay in more secure areas. A sleeping platform and footrest protect from dampness and insects.
Примеры укрытий из пончо (плаща-накидки)
Tuesday, October 5, 2021
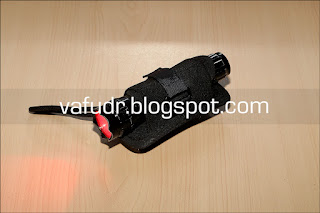
360 Degree Flashlight Rotary Holster
Поворотная на 360 градусов кобура для фонарика
Monday, October 4, 2021
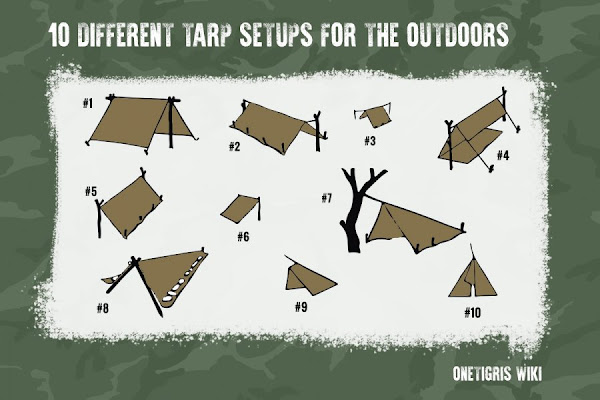
10 Different Tarp Setups
#1
The most popular and usual and easiest setup that allows to make a hammock or tent within.
Step 1. Find a desirable spot and make sure the trees and bushes for the setup are distanced in an perfect way for accommodating the tent/hammock and tarp.
Step 2. First fix up the tent/hammock and make sure a) Guylines and carabiners are properly fastened b) Hammock is placing at the perfect height.
Step 3. Set up the tarp 4" (10cm) above the tent/hammock and make sure at least all four corners of the tarp are staked to the ground, to hold its shape and provide good wind and rain protection.
#2
Similar to setup #1, however a simple shelter with or without a tent, that works in not only forests but bush-camping and on plains as well.
Setup A. Find two trees and setup up the tarp with guylines and staked corners, either with appropriate tent pegs or wooden stakes, for good rain and wind protection.
Setup B. Not appropriate for rainy and/or windy weather conditions. Use two alpenstocks or wooden stakes 3.9-4.9ft (1.2-1.5m) as an alternative of trees. Same setup as above.
#3
A temporary refuge that is close to same to #2 however gives more light.
#4
This setup and #5 and #6 are similar and appropriate for forest environments and autumn/winter seasons when there are fewer insects on the ground. This setup is ideal for sitting on the tarp floor with a campfire in the front of you for warmth.
Step 1. Divide your tarp into three portions and use guylines to fix up the "roof". Make certain the "wall" is leeward, contrary the wind.
Step 2. Peg or spread out the bottom section on the ground, so that the tarp forms a C-shaped shelter.
#5
This setup and #6 are the same however the former is fixed to the ground with stakes and the the latter is with tent pegs. It is a very simple temporary refuge for the wind or sun and is NOT recommended for when you camp overnight.
Step 1. Spread out your tarp and fix the top two corners with guylines to two trees.
Step 2. Tilt the tarp at a 45° and fix the last two corners on the ground with wooden stakes.
#6
This setup and #5 are the same but the former is fixed to the ground with tent pegs and the the latter is with stakes. It is a very simple temporary refuge for the sun or wind and is NOT recommended for when you camp overnight.
Step 1. Spread out your tarp and fix the top two corners with guylines to two trees.
Step 2. Tilt the tarp at a 45° and fix the last two corners on the ground with tent pegs.
#7
This setup and #8 and #9 are comparable in technique however serve different purposes. The easiest of the three using tent pegs or stakes for pinning the tarp to the ground. It's a temporarily refuge for one night time max; take care to construct the walls on the lee side for good wind and rain shelter.
#8
This setup and #7 and #9 are comparable in technique however takes the longest to complete. It is appropriate for winter and colder weather conditions, such as snowy environments, and is best for lengthier stays.
#9
An advanced version of #8, the use of your own tent poles or sturdy branches onsite. This setup gives the best wind protection.
#10
The pyramid setup that is pretty popular amongst outdoorsmen and women. Setup methods vary however the most common is through using a long hiking cane to form the tip of the structure whilst pinning the corners to the ground. Opt for a slanted doorway pulling the flapped entrance to the contrary direction (see picture) with guylines.
10 разных вариантов установки тента
Thursday, September 30, 2021
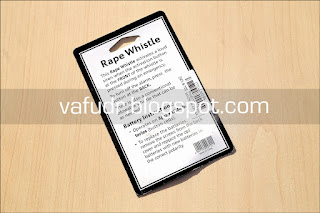
Plapie. Security Emergency Keychain Alarm
120dB emergency alarm with push button activation, 120dB sound capacity alert others around you while in danger. Ideal self defense keychain for college and student security, police and correctional officers, walkers, joggers, elderly, students, lone workers.
Material: Plastics
Color: Black
Dimension: Approx. 70*34*20mm / 2.76x1.34x0.78"
Battery: 3xLR44 Batteries (Included)
Available in store
Review: significantly quieter than Alarm Siren Personal Defense Keychain
Брелок - аварийная сигнализация
Monday, September 27, 2021
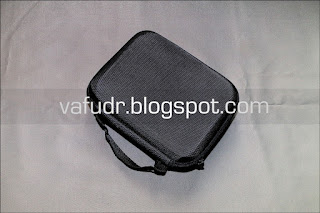
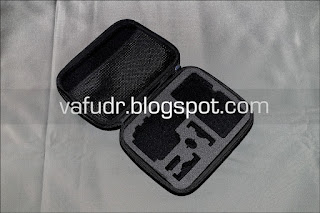
Sport Camera Portable Bag
Size, Medium Bag (L*W*H): 22*17*6.5 cm
Material: EVA
Color: Black
Available in store
Портативный чемоданчик для спортивной камеры

